由于ITX的轨道较重,很多时候我们需要拆卸下机器头进行仪器的校正,以下是仪器扫描头的拆卸方法:
1、从电源适配器上拔下 IntelliTrax 系统,并滑动扫描头,使其离开固定工作台至少 5 英寸(127 毫米)远。Unplug the IntelliTrax2 system from the power adapter and slide the scanning head at least 5 inches (127 mm) away from the docking station.
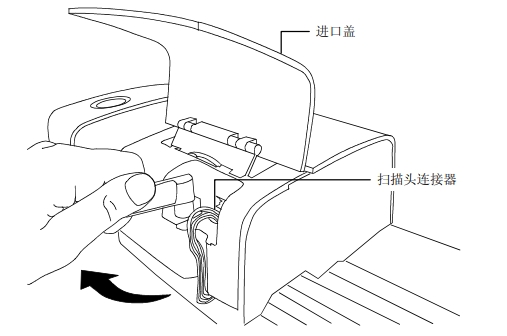
2、抬开扫描头背面的进口盖,暴露出锁杆。Lift the access cover on the back of scanning head to gain access to the locking lever.
3、顺时针旋转锁杆 90°。Rotate the lever 90° clockwise.
4、按压扫描头连接器两侧的两个锁片。使用一副针嘴钳来夹住锁片可能会有所帮助。Compress the two locking tabs located on both sides of the scanning head connector. It may be helpful to use a pair of needle-nose pliers to gain access to the locking tabs.
5、向外拉出连接器,将其从扫描头上取下。Pull the connector outwards to free it from the scanning head.
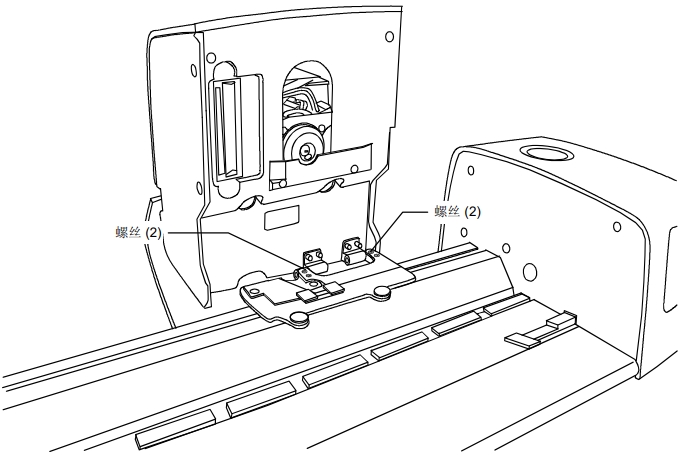
6、抬起扫描头的前部边缘,并让其倾斜,暴露出其底部。Lift up under the front edge of the scanning head and tilt it back to expose the bottom.
7、用一只手握住扫描头,小心地用四个 Phillip 头螺丝把扫描头固定到架台上。Holding the scanning head with one hand, carefully remove the four screws securing the scanning head to the trolley.
8、从架台上抬起扫描头。Lift the scanning head free from the trolley.